

How To Clean Headlights That Have Gone Yellow
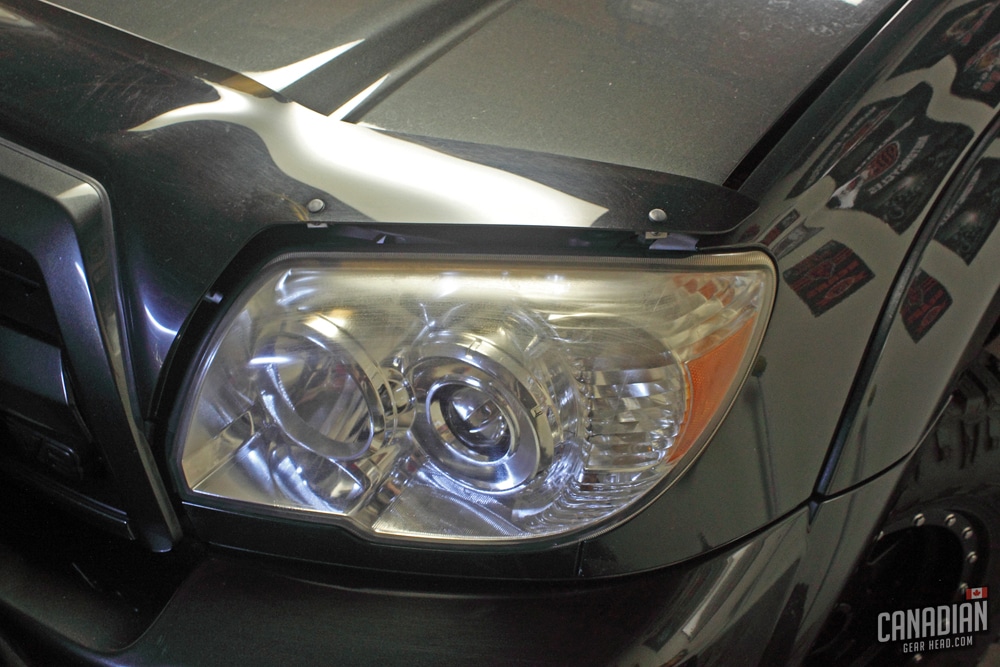
Does your vehicle suffer from yellowish headlights? Don't worry, yous're not alone. This is very common especially on vehicles that spend a lot of time outside in the sun. It leaves them looking deadening and cloudy, and even lowers the light output. Luckily, you lot don't need to buy new ones! Yours can be saved.
Yellow headlights tin be restored as long every bit they are made of plastic and not glass. The failed UV coating that causes the yellowing needs to exist removed with sandpaper, then the headlights can be polished back to clarity. This tin typically exist washed within an hr.
We tin do this job the same way the professionals practice, with products that are easy to observe. If you take skillful care of your auto, at that place's a take a chance you might already ain some of these! Here'south what you'll need to cure cloudy headlights:
Sandpaper – 800, 1000, and 2500 grit
I like to employ 3M automotive newspaper for this because it's easy to find. You can purchase them online hither: 800 Grit | chiliad Grit | 2500 Dust
Painter's record
I prefer this 3M tape but any low-tack tape will work as long as it's easy to peel off
Spray canteen of water
Nothing fancy needed here, tap water is fine
DA polisher
I similar to utilise a Griot'south Garage DA Polisher with a smaller backing plate and iii″ cut pad. You can also practice the compounding and polishing by manus with a towel if you don't have a automobile.
Compound
Any chemical compound that you'd utilize on your pigment will exercise. I like Meguiar'due south D300 but something off the shelf like their Ultimate Compound will work as well.
Shine
Only like the chemical compound, whatever finishing polish will be fine. Meguiar'southward M205 is a swell choice.
Microfiber towels
Any cheaper towel will work. You don't need to waste matter your fancy ones on this job.
Here'south how to restore your yellow headlights:
1. Make clean the headlights
This doesn't have to be perfect, but a quick wipe downward will do the fox. The main thing is that we don't want to have any larger debris grinding into the headlight as nosotros sand.
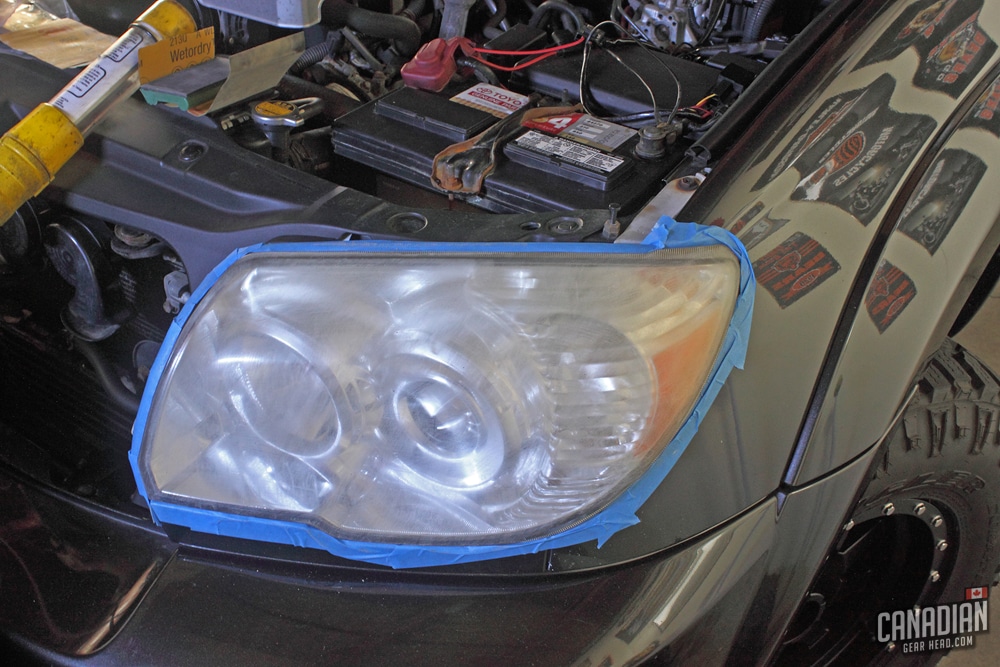
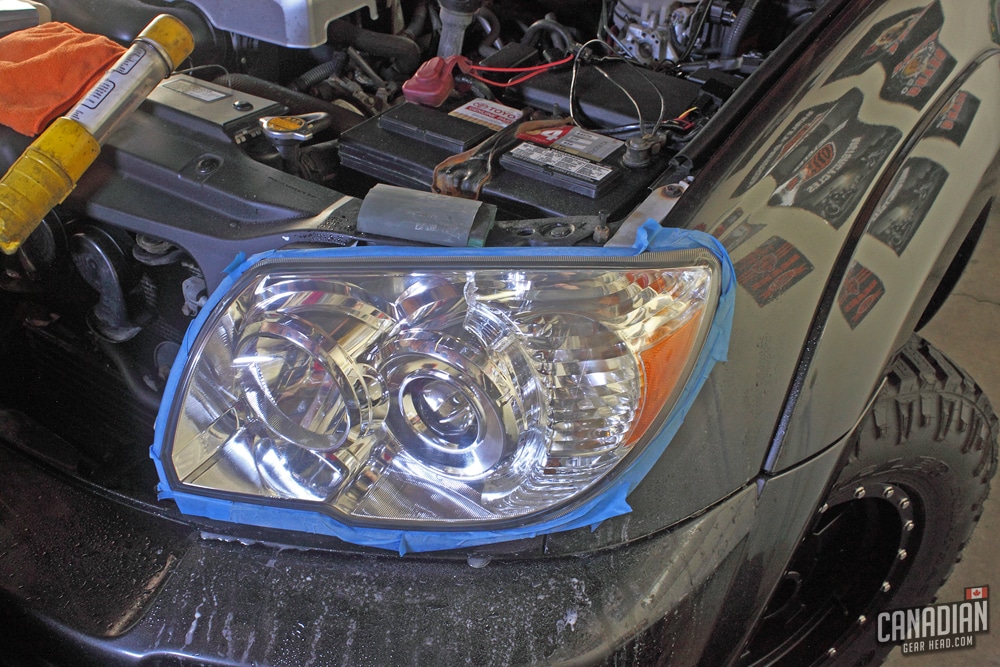
2. Record off any nearby painted areas
This is a very important pace. All it would have is a quick slip with some sandpaper on your paint and you'll be dealing with a whole new issue. Play it prophylactic and tape off the surrounding area of the headlight. 2 strip widths is usually enough coverage.
Tip: On many cars, you lot can just lift the hood rather than tape the top of the headlight.
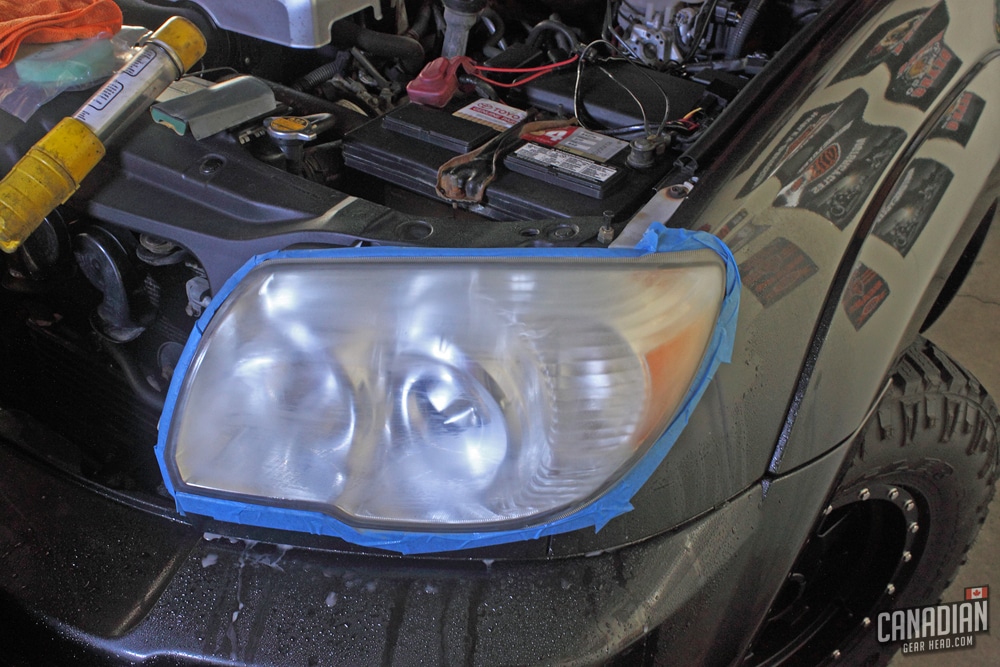
3. Dry out sand with 800 grit
With your 800 grit paper, sand from west to east every bit evenly as yous can. Remember, the more consistent the sanding pattern, the easier the marks volition be to remove when the time comes to refine it. Keep sanding until you feel the yellowish layer is gone. It shouldn't take a whole lot.
This is what I refer to as the "Heart Attack Moment" also known as the "What Have I Washed Moment"! Dry sanding to remove the residue of the failed UV coating is going to experience like you're ruining them even more. Just trust me, information technology'll exist fine.
The cloudiness you just added to your lights will be removed every bit yous go through the following multiple steps of sanding and polishing. They demand to go worse before they can become better – they'll be clear again, I promise!
4. Wet sand with 1000 dust
For the first fourth dimension, we're going to introduce h2o to the process. With your g grit paper, sand from north to south until you no longer see the sanding marks from the previous step (w to eastward).
Tip: If you're having problem seeing, try turning the headlights on. Sometimes that will assist to spot any remaining sanding marks.
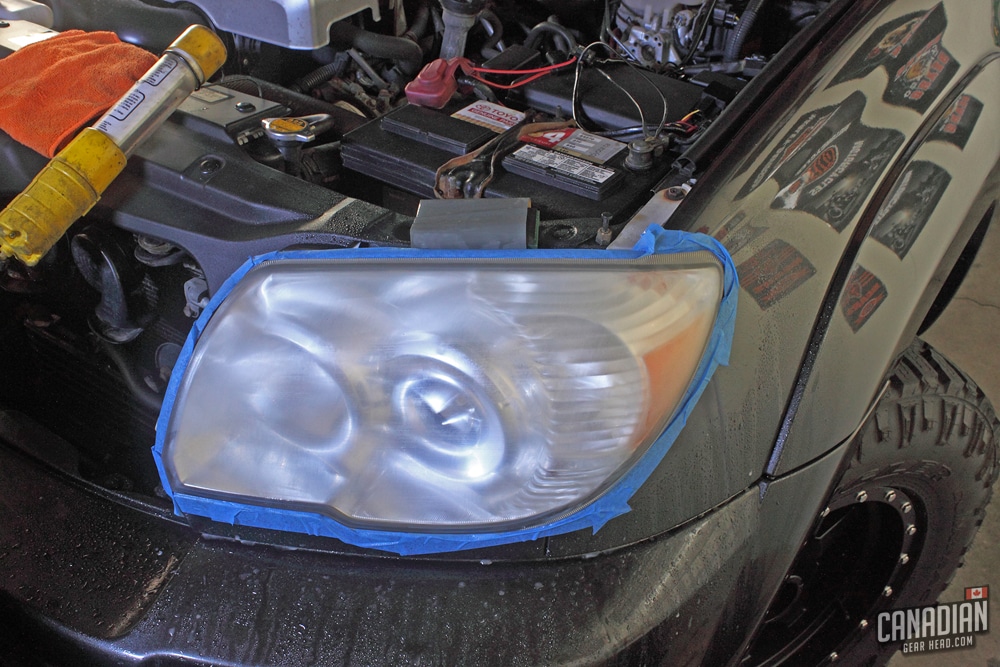
5. Moisture sand with 2500 dust
Now it'due south fourth dimension for another round of moisture sanding, this time with 2500 grit paper. Much similar we did in previous steps, we're going to become in the contrary direction from what nosotros did last (in this example, we're back to west to east).
Again, continue going until you tin no longer meet the 1000 grit marks going vertically. At this stage, you should be starting to run across the headlights become much more than clear already. They're going to become fifty-fifty ameliorate though!
Tip: If you're planning to compound and shine by hand, you might find it easier to add an additional sanding step with 3000 grit paper. The reason being that while 2500 dust will come out easily with a machine, it could take longer by hand. The actress sanding step will bridge the gap and accept some of the workload off when you smoothen.
six. Chemical compound with a polisher
Now that your headlights are starting to look amend, nosotros desire to take information technology a footstep further. Grab your buffer and some compound and become at it. Y'all should see a big difference in clarity over the sanding steps at this point, and for some this will be good enough. For others, we'll want to practise one more step of refinement.
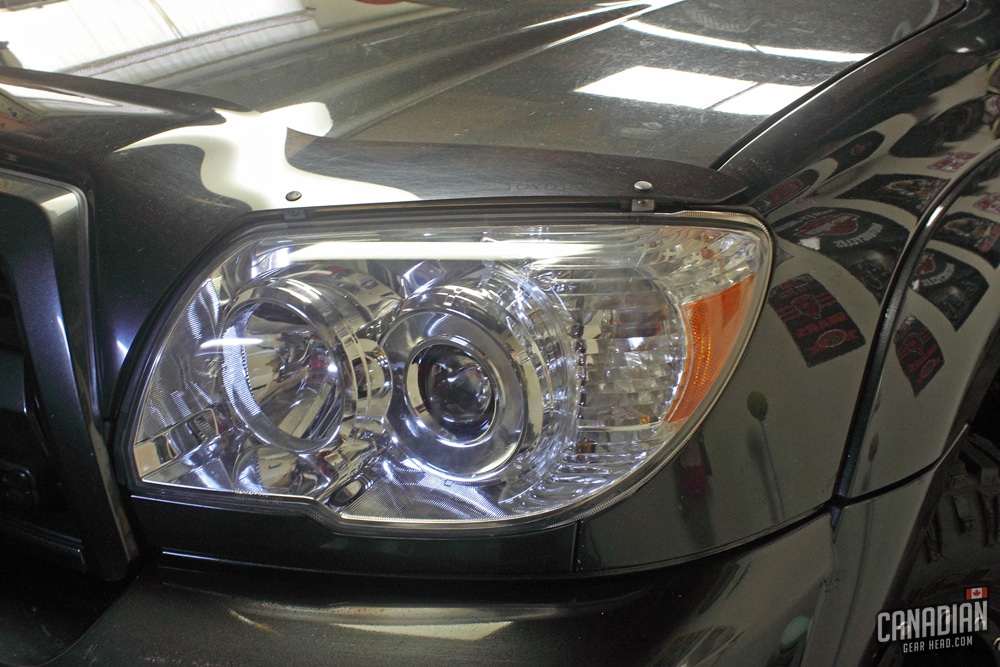
7. Finishing shine (optional)
Compounding with a machine will often leave a little bit of haze, and nosotros can easily remove that with a quick finishing polish. This stride is going to accept your headlights to the next level towards being crystal articulate. It's possible that they'll look even better than new!
The key to getting good results through this entire process is to have your time and keep at information technology. This is very much a case of "yous get out what you put in".
8. Protect them
The final step to restoring your headlights is the near important one. Yous see, without proper protection from UV rays, all of your hard work will exist gone within weeks. That coating that used to protect your plastic has failed (and it'south gone now) so your lights are completely vulnerable to the elements.
You have a few options for protecting them. A traditional paint sealant will work, but you'll demand to reapply it every half-dozen months or so. A leftover bottle of ceramic coating from your paint will also work and likely last longer. A proper spray-on UV blanket or articulate coat paint will be your all-time form of long term protection. Some companies fifty-fifty sell this on ready-to-utilize wipes.
If the worst example happens and they plow cloudy again in the future, at least yous know how to ready them!
9. Bonus tip:
You may not have the products, equipment, or time to set your current headlights. I don't know if you've priced new ones out from the dealer, but they're usually a lot more money than you'd look (although this is the best fashion to fix cloudy headlights if money is no effect).
I'll let you lot in on an interesting tip. Have a trunk shop order you lot a set of aftermarket replacement lights. No, non the weird looking ones that look like pepperonis. The direct OEM replacement ones from an aftermarket company like TYC.
Many times when insurance companies don't want to pay for dealership parts to fix a crashed machine, body shops will use cheaper parts from these aftermarket companies. The lights will look exactly the aforementioned, might be slightly lesser quality, and they'll be a fraction of the price! I've done this in the by with great success.
There you have it. Yous've just restored your headlights in the same way that a professional would. It tin can be a little intimidating at times, only it's not that hard. The results are definitely worth it. Plus, if your lights are already damaged, yous've got aught to lose!
Restoring your headlights is i of the easiest ways to improve the await of your car in a large style. Recall of deadening, yellow headlights equally the weakest link in your outside appearance. It might be surgically clean with shiny wheels and have beautiful, swirl-costless paint, but neglected headlights will drag the overall look downwardly drastically.
Whether y'all're getting gear up for a car testify or you lot're planning to list it for sale, restoring your vehicle'southward headlights is a bang-up way to have years off of its age.
Headlight restoration gone wrong
In that location is plenty of bad advice online when information technology comes to restoring your ain headlights. Toothpaste, problems spray, and WD40 might add some improvement temporarily, merely they are not proper fixes. The DIY kits yous tin can detect at the store will do a much meliorate task merely they tin exist expensive considering their results. Yous can hire a pro to do it (and they'll be happy to – it'due south piece of cake coin) merely it volition cost you.
What causes headlights to plough yellowish, tiresome, and cloudy
The headlights on near mod vehicles have clear plastic lenses on them. That plastic has a coating on it to protect against the sun's UV rays. Without that coating, blank plastic would turn cloudy in a matter of weeks. In near cases, that UV coating volition concluding for a number of years before the sun finally wears it out and causes information technology to fail.
What you lot're seeing when you look at faded yellow headlights is typically the failed UV coating itself. The concept behind restoring your headlights is to remove what'south left of the failed coating, smoothen the plastic, then add a new layer of protection.
When is headlight restoration a bad thought?
Some older vehicles (and loftier-stop ones) actually accept glass housings on the headlights. A traditional headlight restoration won't work on these. The good news is that glass headlights are much less probable to fade or discolor than plastic ones so it shouldn't be an issue. It's always worth checking to make sure they're plastic earlier starting the process though.
As with other detailing jobs like using a clay bar or polishing your pigment, restoring your headlights is something you don't want to do unless y'all absolutely accept to. The real goal is to keep the factory UV coating maintained for equally long equally you lot can earlier you eventually restore them.
It'south all-time to wait until they're bad enough that yous just can't stand information technology anymore – and then restore them. At that indicate, you take nothing to lose.
It'due south worth noting that restoring your headlights won't fix any fading or cracking that happens on the inside of the lens. This typically happens to cheap aftermarket lights more than OEM ones just it's something to consider.
Ways to prevent the need for a headlight restoration
Information technology's always best to proceed the original UV coating for as long equally you tin. Hither are some tips to prolong the need to restore your headlights in the first place:
Continue them clean
Allowing embedded contaminants to build up on your headlights will decrease their longevity. Always launder your headlights when you do the rest of your auto to go on them as clean every bit possible.
Protect them
Protecting the UV blanket on your headlights with a wax, sealant, or ceramic coating is a great manner to prolong their life. This will help to shield the UV coating from the sun, which takes some of the workload off of it. It's important to stay on top of this because it can really make a difference in how long your headlights stay clear.
A adept schedule to follow is to protect your headlights whenever yous protect your pigment. Whether it's a one-time ceramic blanket, or a shot of spray wax after every wash, doing your headlights at the same time as your pigment is easier than trying to call back to do them separately.
Don't park in the sun if y'all don't have to
Pay attending to where your car is parked during the fourth dimension of day when the sun is at its hottest. Consider backing your motorcar in whether it's in your driveway or your parking spot at work in an endeavour to keep the sun off your headlights.
Your taillights are less probable to be damaged past the sun and they're easier to set up if they do get faded. Choosing a parking spot that offers shade from a tree or building is a neat idea equally well.
Call back, the dominicus is what kills the blanket on your headlights. Avoiding the dominicus means you're avoiding yellow headlights!
Never hit them with a polisher
This is a common fault that people often brand. Some professional detailers volition even offer to run a polisher on your headlights while they're doing your paint as a bonus. This is done with good intentions, but it'll really degrade your headlights rather than help them (despite the short term results immediately after).
We know that dull, yellow headlights come up from the UV blanket wearing out and failing. Polishing them with a machine will remove cloth from the coating, making information technology thinner and more than likely to neglect in the future. Unless you're restoring your headlights, you should never utilize a polisher on them.

Source: https://canadiangearhead.com/how-to-fix-headlight-yellowing-professionally/
Posted by: camachoofeautioull1979.blogspot.com
0 Response to "How To Clean Headlights That Have Gone Yellow"
Post a Comment